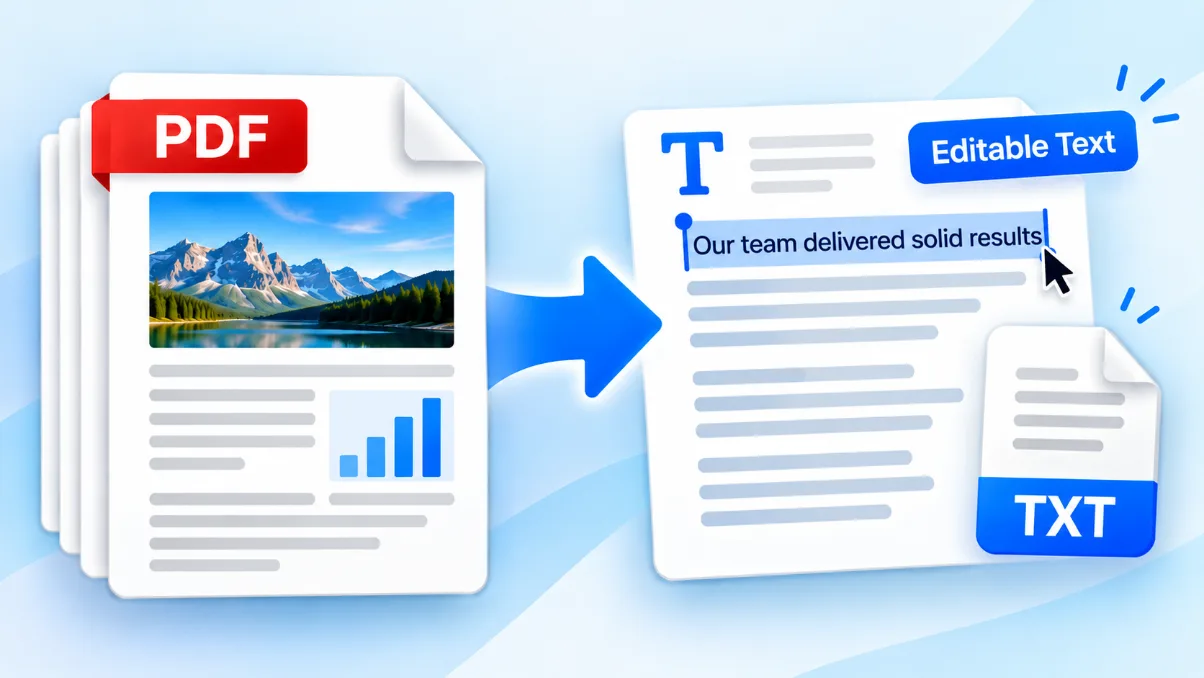
A large PDF can be surprisingly difficult to work with. It may exceed an email attachment limit, take too long to upload, or be rejected by a job portal, school website, or online form.
The obvious solution is to compress it. The less obvious part is deciding how much compression to use without leaving photographs blurry, diagrams difficult to read, or scanned text covered in artifacts.
In practice, compressing a PDF without losing quality usually means reducing unnecessary file data while keeping any visible change small enough that it does not affect how the document is read or used. The right approach depends on what is inside the PDF and where you intend to send it.
This guide explains what makes PDF files large, how compression works, and how to reduce PDF size with the free Solvioza PDF Compressor while protecting the parts of the document that matter.
Can You Compress a PDF Without Losing Quality?
Some PDF compression is completely lossless. A compressor can reorganize the document, improve how its internal objects are stored, remove inefficient data, and optimize certain fonts and streams without changing the visible page.
However, image-heavy PDFs are different. If most of the file size comes from photographs or scanned pages, achieving a substantial reduction will usually require recompressing those images. That process can discard some image information.
This does not automatically mean the result will look bad. A sensible quality setting can make a file considerably smaller while producing little or no noticeable difference at normal viewing size.
It helps to think of the goal this way:
- For text-based documents: preserve sharp text and the original PDF structure.
- For PDFs containing photographs: reduce image data without introducing distracting blur or blocky artifacts.
- For scanned documents: keep small text and signatures readable after compression.
- For forms and important records: confirm that interactive fields, links, annotations, and other essential elements still work.
No single setting is ideal for every document. A presentation filled with large photographs has different requirements from a mostly textual contract or a scanned application form.
What Makes a PDF File So Large?
A PDF is a container that can hold several kinds of content. Its file size is determined by more than its page count.
High-resolution images
Photographs, illustrations, screenshots, and scanned pages are often the largest parts of a PDF. An image may contain far more pixels than the document needs, especially if it came directly from a camera, scanner, or print design.
Scanned pages
A normal digital document may store each sentence as selectable text. A scanned PDF may store every page as one large image instead. Even a short scanned document can therefore be much larger than a longer text-based PDF.
Embedded fonts
Fonts may be embedded to ensure that a document looks correct on other devices. This is useful, but embedding complete font files or several font variants can increase the file size.
Repeated or inefficient data
PDFs created by scanners, design applications, office software, or repeated editing can contain streams and objects that are not stored efficiently. Reorganizing these elements may reduce the file without visibly changing it.
Detailed graphics
Charts, technical drawings, and vector illustrations can contain many individual paths and objects. These elements usually remain sharp at any zoom level, but a very complex graphic may still require substantial storage.
How to Compress a PDF Without Noticeably Losing Quality
The safest method is to begin with a balanced setting, inspect the result, and only use stronger compression when necessary.
1. Open the PDF Compressor
Go to the PDF Compressor. The tool processes files in your browser, so your PDF stays on your device during compression.
2. Add your PDF files
Drop the PDFs into the upload area or choose them from your device. You can add up to 20 files, provided that the combined batch is no larger than 100 MB.
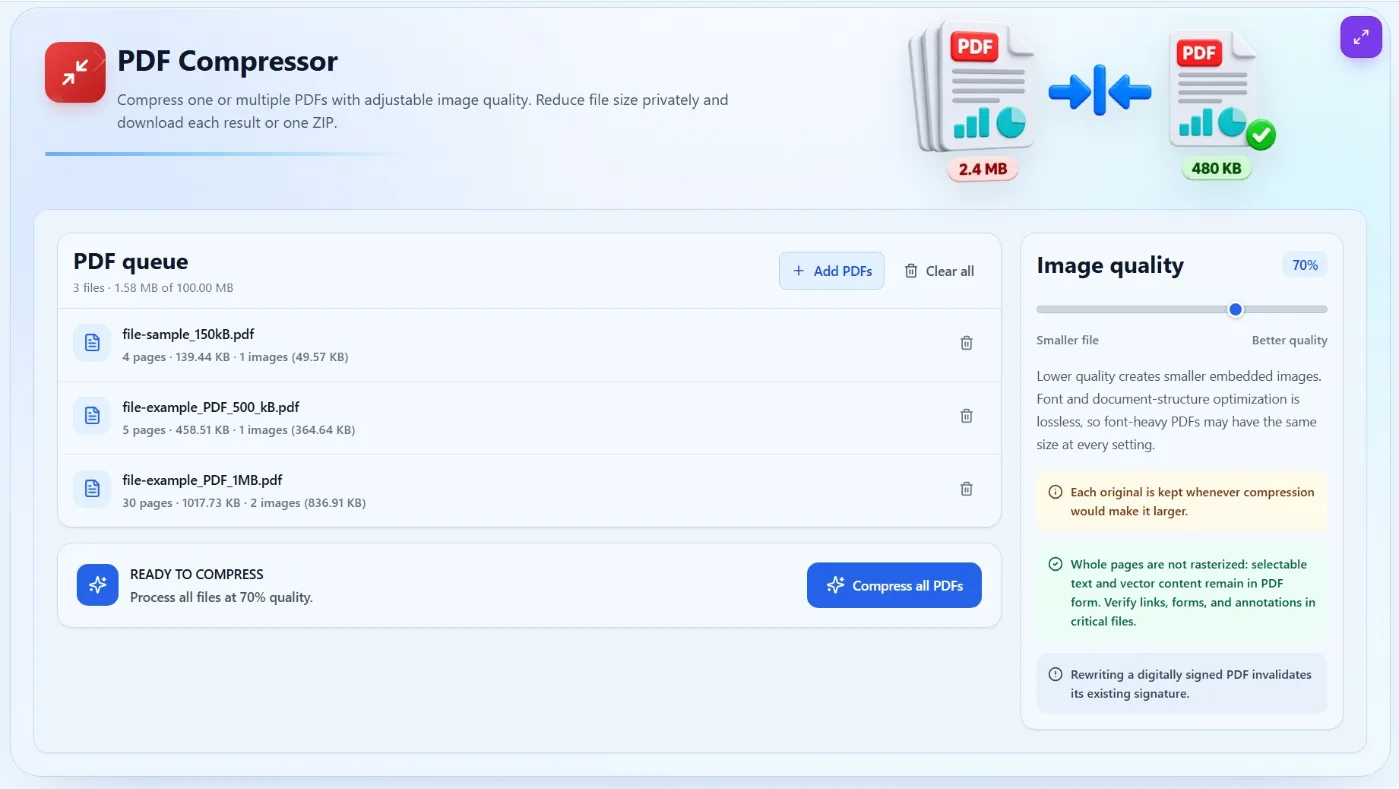
The queue shows useful information about each document, including its page count, original file size, and detected raster images. This can help you understand whether images are likely to be responsible for most of the file size.
3. Start with the default 70% quality
The default 70% setting is a practical starting point for mixed documents containing text, graphics, and photographs. It aims for a useful reduction without immediately applying very aggressive image compression.
The percentage controls the quality used for eligible embedded images. It does not turn the whole page into an image. Selectable text and vector content remain in PDF form.
4. Compress the files
Select Compress all PDFs and keep the tab open while processing finishes. Each file is handled locally, and the tool compares the compressed attempt with its original.
If compression would create a larger file, the original is kept instead. This prevents you from downloading a supposedly compressed PDF that takes up more space than the file you started with.
5. Compare the file sizes
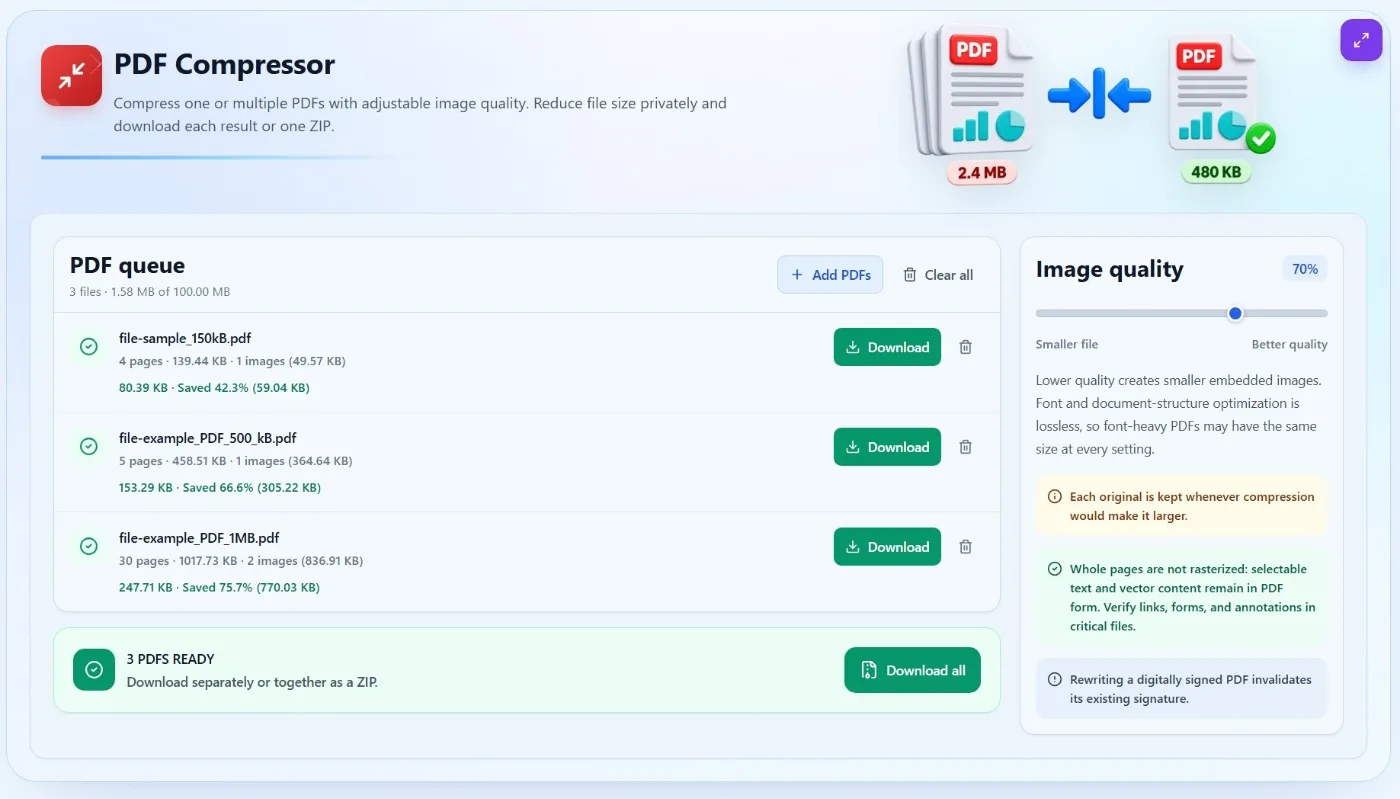
After processing, the result displays the new file size and the amount saved. A large reduction is useful, but it should not be your only measure of success.
Open the downloaded PDF and inspect pages containing:
- small text or footnotes;
- photographs and gradients;
- screenshots containing interface text;
- charts, diagrams, and thin lines;
- signatures, stamps, or handwritten notes;
- QR codes and barcodes.
View these pages at the size your recipient is likely to use. If the document will be printed, make a test print rather than relying only on a screen preview.
6. Adjust the quality if needed
If the PDF is still too large, reduce the quality gradually and compress it again. If images look soft or text inside scanned pages becomes difficult to read, move the setting higher.
A few careful attempts are usually better than immediately choosing the lowest possible quality.
7. Download your result
Download each compressed PDF separately, or download all completed files together in a ZIP archive. Keep the original files until you have opened and checked every result.
Which PDF Compression Quality Should You Choose?
The best setting depends on the content and the destination of the document. The following ranges are useful starting points rather than universal rules.
| Quality range | Suitable for | What to check |
|---|---|---|
| 80–100% | Portfolios, product sheets, detailed graphics, photographs, and files intended for printing | Fine image detail, gradients, small labels, and print clarity |
| 60–79% | Reports, presentations, assignments, manuals, and general email attachments | Screenshots, charts, scanned text, and normal page readability |
| 35–59% | Documents that must meet a strict upload limit and are mainly intended for on-screen reading | Image softness, compression artifacts, signatures, and small text |
| 1–34% | Cases where minimum size matters more than image fidelity | All visual content carefully; quality loss may be obvious |
If a PDF contains few or no raster images, moving the quality slider may have little effect. In that case, the file size is more likely to come from fonts, vector graphics, document structure, or content that cannot be reduced much without changing the document itself.
How to Get a Smaller PDF While Keeping It Clear
Begin with the source document when possible
If you still have the original Word document, presentation, layout file, or collection of images, export a fresh PDF using appropriate image settings. A well-prepared source often produces a better result than repeatedly compressing an already compressed PDF.
Avoid repeated compression
Recompressing the same images several times can gradually reduce their quality. Keep a clean original and create each new version from that file instead of compressing the previous compressed copy.
Remove pages you do not need
Compression is not the only way to make a PDF smaller. If the recipient only needs part of a long document, use the Split PDF tool to extract the relevant page range.
Combine files only when it helps the workflow
If several small documents belong together, the PDF Merger can place them in one file. This may make the documents easier to share, although combining files does not guarantee a smaller total size.
Prepare image-based PDFs carefully
When creating a PDF from photographs or scans, oversized source images can produce an unnecessarily large document. The Images to PDF Converter provides image-quality and layout controls so you can make sensible decisions when the PDF is first created.
Use the smallest reduction that solves the problem
If an upload form accepts files up to 10 MB and your PDF is 10.4 MB, you do not need to reduce it to 1 MB. Compress it just enough to fit the requirement while retaining as much image detail as possible.
Why Some PDFs Do Not Become Much Smaller
A small reduction does not necessarily mean that the compressor failed. Some PDFs are already efficiently optimized, while others contain content that cannot be reduced safely by a general-purpose compressor.
Common reasons include:
- The images were already compressed before being added to the PDF.
- The document is mostly text and simple vector content.
- The file contains complex graphics rather than large photographs.
- The PDF was previously optimized by its original application.
- The remaining data is necessary for fonts, forms, attachments, or other document features.
Solvioza keeps the original whenever the attempted compression is larger. If that happens, you can try a lower image-quality setting, remove unnecessary pages, or return to the source document and export it with different options.
Will Compression Make PDF Text Blurry?
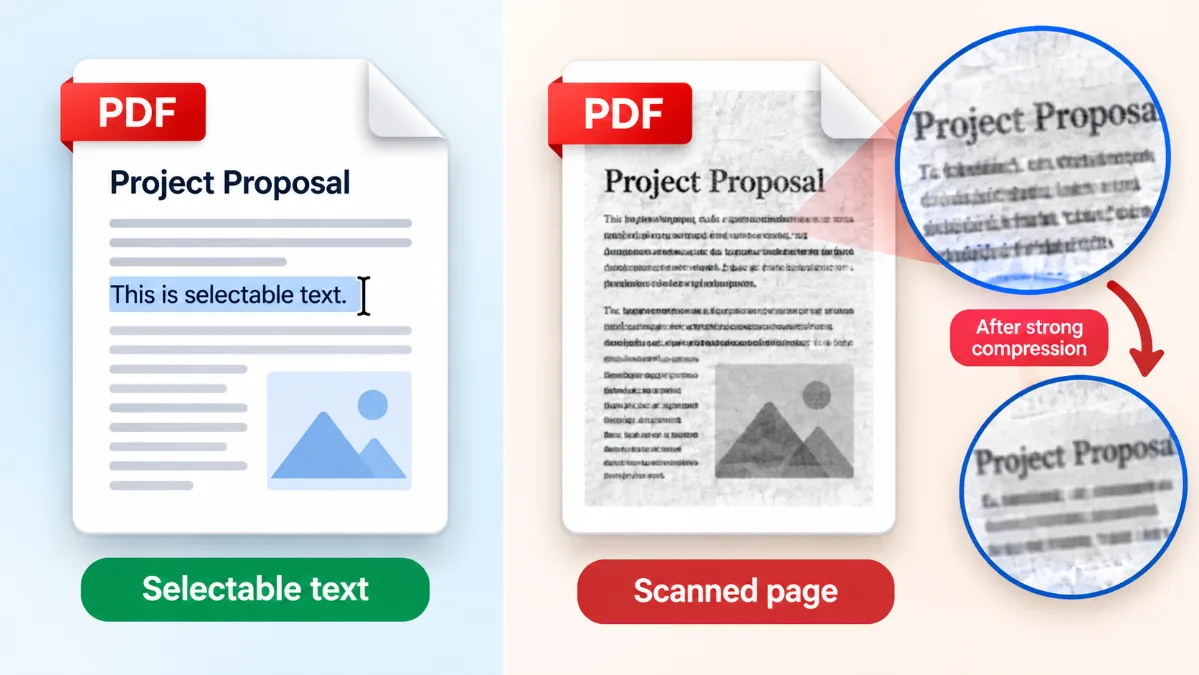
Digitally created text should remain sharp because the compressor does not rasterize every page. Selectable text stays as text, and vector elements remain vector content.
Scanned text is different. A scanned page is usually an image, even though it looks like a page of text. Lowering image quality too far can soften letter edges or introduce artifacts around the characters.
You can quickly check which type you have by trying to select a sentence. If individual words can be highlighted, the document likely contains real text. If the entire page behaves like one picture, it is probably a scan.
What Should You Check After Compressing a PDF?
Always review an important document before sending or publishing it. Check more than the first page.
- Confirm that every page is present and in the correct orientation.
- Zoom in on small text, charts, screenshots, and scanned pages.
- Test links, bookmarks, form fields, comments, and annotations that matter.
- Check QR codes or barcodes with an appropriate scanner.
- Print a representative page if the file is intended for print.
- Confirm that the new size meets the email or upload limit.
Compression rewrites the PDF. That means an existing digital signature may no longer be valid after processing. Preserve the signed original, and avoid compressing a signed document unless you understand how the change will affect its verification.
Are Online PDF Compressors Safe?
The answer depends on how a particular service processes uploaded documents. Some services send files to a remote server, while browser-based tools may perform the work locally.
Solvioza’s PDF Compressor processes the file on your device. This is useful for privacy because the document is not uploaded for compression. It also means that performance depends partly on your browser, device memory, and the size and complexity of the PDF.
Password-protected and encrypted PDFs are not supported. If you own the file and have permission to modify it, you can first remove its password with the Unlock PDF tool, then compress the unlocked copy.
For highly sensitive, regulated, or legally important documents, follow your organization’s handling policy regardless of which tool you use.
Reduce PDF Size Without Guesswork
Good PDF compression is a balance, not a race to produce the smallest possible file. Start with a moderate setting, compare the result with the original, and lower the quality only when you need additional savings.
When you are ready, open the Solvioza PDF Compressor, add your files, and begin with the default 70% quality. Check the pages that matter most before sharing the finished document.