A watermark does two jobs at once.
It helps protect your image from casual reuse, and it helps people remember where the image came from. That is why photographers, designers, shop owners, bloggers, and social media creators all use them.
The good part is that you do not need Photoshop or a complicated editor for this anymore.
With Solvioza, you can add a text watermark or logo watermark to an image online, preview the result, move it into the right position, and export the final image in just a few steps.
Learn how to add a watermark to an image online without losing quality using Solvioza in just a few minutes.
Watch the quick tutorial below if you want to see the full workflow before following the written steps.
What Is an Image Watermark?
An image watermark is a visible label placed on top of an image.
It can be:
- Text, such as your brand name or website name
- A logo
- A symbol
- A repeated pattern across the image
- A small signature in one corner
Most people use watermarks for one of three reasons:
- To discourage image theft
- To show ownership
- To keep branding visible when images are shared elsewhere
A watermark does not make theft impossible, but it makes casual reuse much less attractive.
When Should You Use a Text Watermark or a Logo Watermark?
A text watermark works well when you want something quick, clear, and lightweight.
For example:
- Your business name
- Your website name
- Your Instagram handle
- A copyright notice
- A short brand label
A logo watermark works better when your visual identity matters more than plain text.
For example:
- Store logos
- Photography logos
- Product brand marks
- Design studio marks
- Company icons
If you want speed and simplicity, use text.
If you want stronger branding, use a logo.
Solvioza’s Image Watermark tool supports both, so you do not need separate workflows.
How to Add a Watermark to an Image Online in Solvioza
The easiest way to add a watermark to an image online is to work in this order:
- Upload the image
- Choose text or logo watermark mode
- Style the watermark
- Set the position
- Adjust opacity, size, and spacing
- Preview the image
- Export the final file
That order keeps things simple.
You do not need to guess what the watermark will look like. Solvioza shows a live preview while you edit, which makes small adjustments much easier.
Step 1: Upload Your Image
Start by opening the Image Watermark tool in Solvioza and uploading the image you want to protect.
The tool supports common image formats such as JPG, PNG, and WebP. If your file opens correctly, you can begin editing right away.
If the image needs framing first, crop it before watermarking. Solvioza’s Image Cropper is useful here, especially when the subject is too close to the edge or the image has extra empty space.
Most people skip this and watermark the image too early.
That creates extra work later.
If the base image needs cleanup, fix that first.
Step 2: Choose Text Watermark or Logo Watermark
Once the image is loaded, choose the watermark type.
If you select text mode, you can enter your watermark text directly. A simple brand name like “Solvioza” or your own business name usually works best.
If you select logo mode, upload a logo file and place it on the image.
This is where the article becomes practical for your site, because Solvioza’s Image Watermark tool supports both options natively. You are not forcing a fake workaround with another editor.
Use text mode when you want speed.
Use logo mode when brand recognition matters more.
Step 3: Style the Watermark
If you are using text, this is where you shape how it looks.
Solvioza lets you adjust:
- Text content
- Font family
- Font size
- Text color
- Bold
- Italic
- Opacity
- Rotation
That gives you enough control to make the watermark visible without making it distracting.
A watermark should be easy to notice, but it should not ruin the image.
In most cases, a white or light watermark with medium opacity works well on darker images. On bright images, a darker watermark may read better.
If you are using a logo watermark instead, the styling is simpler. The main controls become size, opacity, position, and margin.
Step 4: Place the Watermark in the Right Position
Position matters more than people think.
A watermark in the wrong place can cover a face, product, title, or important design detail. A watermark in the right place feels intentional.
Solvioza gives you preset positions such as:
- Top left
- Top right
- Center
- Bottom left
- Bottom right
This is useful if you want a quick, clean placement.
You can also drag the watermark in the preview to fine-tune the position. That is often the better choice when the image layout is not symmetrical.
A few placement tips help:
- Use a corner watermark for product photos, blog images, and social posts
- Use a centered watermark for stronger protection
- Use a repeated tiled watermark for high-risk images that are often copied
- Leave enough edge margin so the watermark does not feel cramped
If the watermark is too close to the edge, it can look accidental.
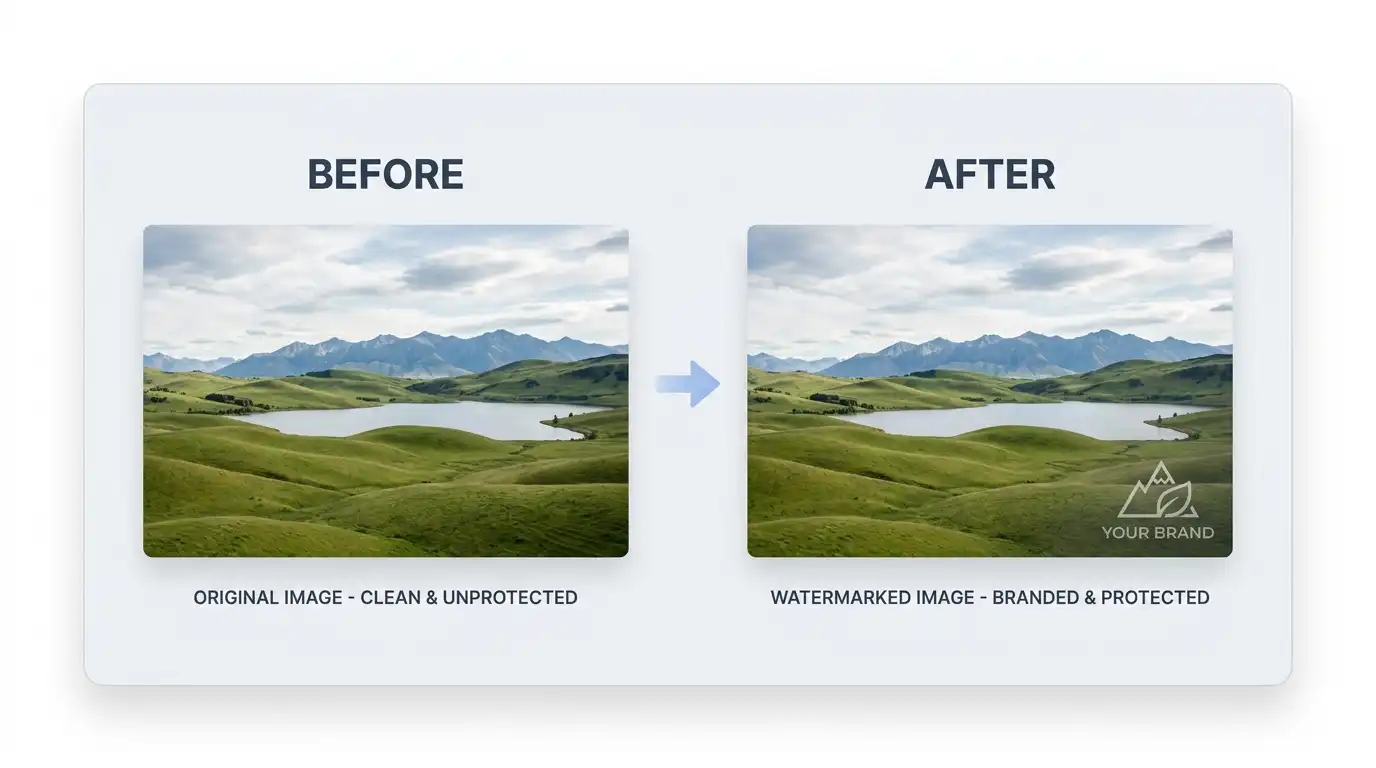
Before and after comparison showing how a watermark can add branding and ownership information to an image.
Step 5: Adjust Opacity, Size, and Rotation
This is where the watermark starts to feel professional.
Three settings usually make the biggest difference:
- Opacity
- Size
- Rotation
Low opacity makes the watermark softer and less distracting.
A larger watermark is more visible, but it can overpower the image if pushed too far.
Rotation helps when you want the watermark to feel more embedded into the composition instead of sitting flat like a sticker.
If your goal is subtle branding, keep the watermark smaller and lighter.
If your goal is protection, make it more visible or use tiled mode.
Solvioza also lets you adjust edge margin for single watermarks and tile gap for repeated watermarks, which is very useful when you are applying the same style across several images.
Step 6: Use Tiled Watermark Mode if You Need Stronger Protection
Sometimes a corner logo is not enough.
If you are sharing portfolio work, paid content previews, design drafts, or original photography, a repeated watermark pattern can be more effective.
Solvioza’s tiled watermark mode repeats the watermark across the image and lets you control the tile gap.
That makes it much harder for someone to crop out the watermark cleanly.
Tiled mode is a stronger protection choice when:
- You are sharing previews
- You are posting original artwork
- You are publishing product samples
- You want visible ownership across the full image
For everyday branded images, a single watermark is usually cleaner.
For higher-risk content, tiled mode is the safer option.
Step 7: Preview Before Exporting
Never watermark an image and download it blindly.
Use the live preview and check these questions:
- Is the watermark readable?
- Is it covering anything important?
- Does it feel too strong or too faint?
- Does the image still look polished?
- Is the watermark too close to the edge?
- If it is a logo, does it look sharp?
This step matters because the settings can look different on different images.
A watermark that looks perfect on a dark product photo may be hard to read on a bright outdoor shot.
That is why previewing matters more than memorizing one “perfect” setting.
Step 8: Export in the Right Format
Once the preview looks right, export the image.
Solvioza’s watermark tool supports exporting to:
- JPG
- PNG
- WebP
Choose the format based on where the image is going.
Use JPG when:
- The image is a normal photo
- You want smaller file sizes
- The image is going to websites or social media
Use PNG when:
- You want sharper edges in graphics
- The image contains text-heavy designs
- You want less compression impact
Use WebP when:
- The image is for modern web publishing
- You want smaller file sizes with good quality
If your watermarked image needs a different format later, you can use Solvioza’s PNG to JPG Converter or WebP to JPG Converter.
How to Add a Logo Watermark to an Image Online
If your brand already has a logo, the logo watermark workflow is straightforward.
- Upload your main image
- Switch the watermark mode to logo
- Upload your logo file
- Resize the logo watermark
- Lower the opacity if needed
- Choose a preset position or drag it manually
- Preview and export
This is often the best choice for product photos, business banners, original designs, and portfolio work.
Just make sure the logo is not too large.
A watermark should support the image, not fight with it.
How to Add a Text Watermark to an Image Online
If you do not have a logo ready, text mode is still strong.
- Upload your image
- Switch to text mode
- Enter your watermark text
- Choose the font, color, size, and style
- Adjust opacity and rotation
- Place it in a corner, center, or repeated layout
- Preview and download
This is the fastest way to add a visible ownership mark to an image online.
It is also easier to update if your needs change often.
For example, you can watermark one batch with your brand name and another batch with a seasonal campaign label.
How to Watermark Multiple Images at Once
This is where the tool becomes even more useful.
Solvioza supports batch uploads, which means you can apply one watermark setup across multiple images.
That is especially helpful for:
- Product image batches
- Portfolio previews
- Blog graphics
- Client galleries
- Social media sets
- Marketplace images
The smart approach is to set the watermark once, preview it carefully, then apply it across the full batch.
If all images follow a similar layout, this saves a lot of time.
What to Do Before Watermarking
Sometimes watermarking is not the first task.
You may want to prepare the image before adding the watermark.
Use Image Cropper if the subject needs better framing.
Use Image Resizer if the image is too large for your page or upload target.
Use Image Compressor if the file is too heavy after watermarking.
This matters because a huge unoptimized file with a watermark is still a huge unoptimized file.
A cleaner workflow is:
- Crop first if needed
- Resize if needed
- Add watermark
- Compress the final image if the file is too large
That order usually produces the cleanest result.
If your goal is to add branding without making the image look messy, this is the workflow to follow.
Related tools:
- Image Watermark
- Image Cropper
- Image Resizer
- Image Compressor
- PNG to JPG Converter
- WebP to JPG Converter
Common Mistakes to Avoid
The first mistake is making the watermark too strong.
If the watermark becomes the first thing people notice, it can hurt the image more than it helps.
The second mistake is making it too faint.
If people cannot see it at normal size, it is not doing much.
Other common mistakes include:
- Placing the watermark over a face or product
- Using unreadable fonts
- Making the watermark too small
- Using the same placement on every image without checking the layout
- Exporting in the wrong format
- Forgetting to preview brightness and contrast
- Watermarking before fixing crop or image size
A watermark should feel deliberate.
Not random. Not rushed.
FAQ
How do I add a watermark to an image online?
Upload the image to Solvioza’s Image Watermark tool, choose text or logo mode, adjust the watermark settings, preview the result, and export the final image.
Can I add a text watermark and a logo watermark?
The tool supports both text and logo watermark modes, but you usually choose one watermark style per export setup.
What is the best watermark position on an image?
A corner position works well for subtle branding. A center or tiled watermark works better if your goal is stronger image protection.
How do I watermark multiple images at once?
Upload multiple images, create one watermark setup, preview it, and apply it across the batch before exporting.
Will watermarking reduce image quality?
Watermarking itself does not need to ruin quality, but the export format and compression settings affect the final result. Preview before downloading.
Should I use JPG or PNG for watermarked images?
Use JPG for standard photos and smaller files. Use PNG for sharper graphic edges or text-heavy images.
How do I add a logo watermark to an image online?
Upload your image, switch to logo mode, upload the logo file, adjust its size and opacity, set the position, then export the final watermarked image.
Can I add a watermark without Photoshop?
Yes. Solvioza’s Image Watermark tool lets you add a text or logo watermark online without needing Photoshop or desktop editing software.
Final Thoughts
If you want to add a watermark to an image online, the simplest approach is to use a tool that already supports both text and logo workflows properly.
Solvioza does that well.
You can upload the image, choose text or logo mode, place the watermark where it belongs, preview it live, and export the final file without turning the process into a design project.
For most people, that is all you need: clear branding, better protection, and a result that still looks polished.